2022年4月18日 星期一

在Spyder當中用EDB在stackup當中插入新的layers

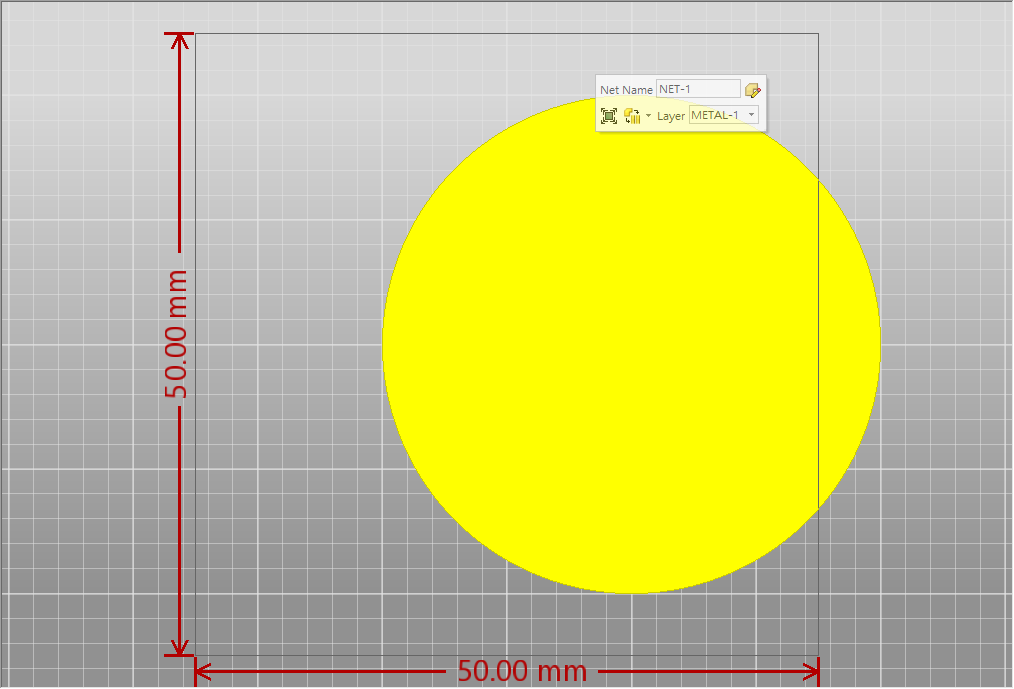
 注意需要將layer複製,才能修改屬性。

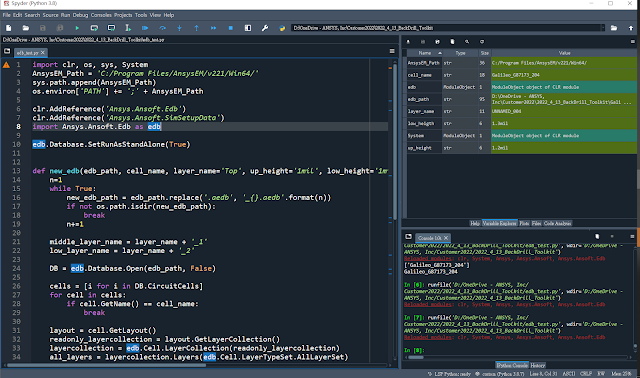
import clr, os, sys, System
from distutils.dir_util import copy_tree

AnsysEM_Path = 'C:/Program Files/AnsysEM/v221/Win64/'
sys.path.append(AnsysEM_Path)
os.environ['PATH'] += ';' + AnsysEM_Path

clr.AddReference('Ansys.Ansoft.Edb')
clr.AddReference('Ansys.Ansoft.SimSetupData')
import Ansys.Ansoft.Edb as edb

edb.Database.SetRunAsStandAlone(True)

aedb_path = "D:\demo2\Galileo_G87173_20431.aedb"
cell_name = 'Galileo_G87173_204'
layer_name = 'UNNAMED_004'
up_height = '10mil'
low_height = '12mil'

# %%----------------------------------------------------------------------------
n = 1
while True:
new_aedb_path = aedb_path.replace('.aedb', '_{}.aedb'.format(n))
if not os.path.isdir(new_aedb_path):
break
n += 1
copy_tree(aedb_path, new_aedb_path)

middle_layer_name = layer_name + '_1'
low_layer_name = layer_name + '_2'

DB = edb.Database.Open(new_aedb_path, False)

try:
cells = [i for i in DB.CircuitCells]
for cell in cells:
if cell.GetName() == cell_name:
break

layout = cell.GetLayout()
raw_layercollection = layout.GetLayerCollection()
new_layercollection = edb.Cell.LayerCollection(raw_layercollection)

all_layers = raw_layercollection.Layers(edb.Cell.LayerTypeSet.AllLayerSet)

for layer in all_layers:
if layer.GetName() == layer_name:
layer_material = layer.GetMaterial()
layer2 = edb.Cell.StackupLayer(middle_layer_name, edb.Cell.LayerType.SignalLayer, edb.Utility.Value('0'),
edb.Utility.Value(0), "COPPER")
layer3 = edb.Cell.StackupLayer(low_layer_name, edb.Cell.LayerType.DielectricLayer,
edb.Utility.Value(low_height), edb.Utility.Value(0), layer_material)
new_layercollection.AddLayerBelow(layer2, layer_name)
new_layercollection.AddLayerBelow(layer3, middle_layer_name)

empty_layercollection = edb.Cell.LayerCollection()
for layer in new_layercollection.Layers(edb.Cell.LayerTypeSet.AllLayerSet):
if layer.GetName() == layer_name:
layer = layer.Clone()
layer.SetThickness(edb.Utility.Value(up_height))
empty_layercollection.AddLayerBottom(layer)
else:
empty_layercollection.AddLayerBottom(layer)

layout.SetLayerCollection(empty_layercollection)

DB.Save()
except:
raise
finally:
DB.Close()


2022年3月16日 星期三

如何在AEDT Console執行Script

 可以使用execfile()指令如下,搭配input()可做為一個簡單互動的UI。


利用批次檔執行AEDT Classical API Script

 test.bat

PATH="C:\Program Files\AnsysEM\v221\Win64\common\IronPython";%PATH%

ipy64 .\test.py
pause

test.py

import sys
sys.path.append(r'C:\Program Files\AnsysEM\v221\Win64\PythonFiles\DesktopPlugin')
sys.path.append(r'C:\Program Files\AnsysEM\v221\Win64')

import ScriptEnv
ScriptEnv.Initialize("Ansoft.ElectronicsDesktop")
oDesktop.RestoreWindow()
oProject = oDesktop.NewProject()

2022年2月25日 星期五

如何在編輯器環境編寫Classical AEDT API腳本

Spyder當中直接編輯Classical AEDT  API代碼,pip install pypiwin32

from win32com import client

oApp = client.Dispatch("Ansoft.ElectronicsDesktop.2022.1")
oDesktop = oApp.GetAppDesktop()
oDesktop.RestoreWindow()
oProject = oDesktop.NewProject()
oDesign = oProject.InsertDesign("HFSS", "HFSSDesign1", "HFSS Terminal Network", "")
oEditor = oDesign.SetActiveEditor("3D Modeler")
oEditor.CreateCylinder(
[
"NAME:CylinderParameters",
"XCenter:=" , "0mm",
"YCenter:=" , "-0.3mm",
"ZCenter:=" , "0mm",
"Radius:=" , "0.282842712474619mm",
"Height:=" , "0.8mm",
"WhichAxis:=" , "Z",
"NumSides:=" , "0"
],
[
"NAME:Attributes",
"Name:=" , "Cylinder1",
"Flags:=" , "",
"Color:=" , "(143 175 143)",
"Transparency:=" , 0,
"PartCoordinateSystem:=", "Global",
"UDMId:=" , "",
"MaterialValue:=" , "\"vacuum\"",
"SurfaceMaterialValue:=", "\"\"",
"SolveInside:=" , True,
"ShellElement:=" , False,
"ShellElementThickness:=", "0mm",
"IsMaterialEditable:=" , True,
"UseMaterialAppearance:=", False,
"IsLightweight:=" , False
])
#oDesktop.QuitApplication()


如何在編輯器環境編寫SIwave腳本

在Spyder當中使用win32com可以直接編輯SIwave代碼。可以pip install pypiwin32安裝win32com模組。

from win32com import client


oApp = client.Dispatch("SIwave.Application.2022.1")
oApp.RestoreWindow()
oDoc = oApp.GetActiveProject()
oDoc.ScrDrawCircle(10, 0, 20, 'METAL-1', 'NET-1', 'mm')
oDoc.ScrSaveProjectAs ('d:/demo/test215.siw')
oApp.Quit()


2022年2月24日 星期四

pyAEDT如何呼叫舊的API所寫的函數

假使我們之前已經用classical API開發了很多的自動化程式,能否在pyAEDT當中呼叫舊的程式碼,省去從頭開發的時間?答案是可以的,比方說,classical.py當中用舊的API開發的createBoxArray函數,我們可以在pyAEDT程式當中將其匯入,並使用該函數。底下範例使用non-graphical模式在不啟用GUI的狀況底下完成建模。

classical.py

def createBoxArray(m, n, spacing=1):
for i in range(m):
for j in range(n):
oEditor.CreateBox(
[
"NAME:BoxParameters",
"XPosition:=" , "{}mm".format(i*spacing),
"YPosition:=" , "{}mm".format(j*spacing),
"ZPosition:=" , "0mm",
"XSize:=" , "0.3mm",
"YSize:=" , "0.3mm",
"ZSize:=" , "0.4mm"
],
[
"NAME:Attributes",
"Name:=" , "Box1",
"Flags:=" , "",
"Color:=" , "(143 175 143)",
"Transparency:=" , 0,
"PartCoordinateSystem:=", "Global",
"UDMId:=" , "",
"MaterialValue:=" , "\"vacuum\"",
"SurfaceMaterialValue:=", "\"\"",
"SolveInside:=" , True,
"ShellElement:=" , False,
"ShellElementThickness:=", "0mm",
"IsMaterialEditable:=" , True,
"UseMaterialAppearance:=", False,
"IsLightweight:=" , False
])

new.py

from pyaedt import Hfss

hfss = Hfss(specified_version='2022.1', non_graphical=True)

import classical
classical.oEditor = hfss.modeler.oeditor
classical.createBoxArray(4, 8, 1)

hfss.plot()


2022年2月20日 星期日

inheritance Example

 類別繼承基本

class mylist(list):
def __init__(self, x):
super().__init__(x)

def multiply(self, x):
temp = [i for i in self]
self.clear()
for i in temp:
self.append(i * x)


x = mylist([1, 2, 3])
x.append(4)
x.multiply(3)
print(x)